Category Archives: Tips and Advice

Fixer-upper or move-in ready home?

Shows like HGTV’s “Fixer Upper” have popularized the idea of buying and renovating the worst house on the best block. Homes that need major remodeling, however, aren’t for everyone. Sometimes a move-in ready house is a better option. Whether you’re a first-time homebuyer or a seasoned investor, it’s important to understand the pros and cons of each.

Pros of Fixer-Uppers

  • Lower price — Homes that require some updating tend to be priced lower, and many renovations can quickly add value to your home.
  • Creative control — When you’re the one in charge of updating your home, you can customize it however you choose.

Cons of Fixer-Uppers

  • Delayed move-in — The planning and work involved to fix it up can significantly delay your move-in date.
  • Unexpected costs — No matter how well you plan, major renovations are always subject to unforeseen expenses.

Pros of Move-In Ready

  • Quick move-in — Can’t wait to begin nesting? With a finished home, you can start moving in as soon as you get your keys.
  • Energy-efficient technology — New and renovated homes are often outfitted with the latest energy-efficient options when it comes to kitchen appliances and heating and cooling systems, which can save you money over time.

Cons of Move-In Ready

  • More expensive — To recoup the costs of updating, sellers often price move-in ready homes much higher. These homes also don’t allow for easy customization.
  • Questionable quality — When you’re not there to oversee the update process, you’re unable to ensure that high-quality work and materials are used for your home.

Still not sure which approach is right for you? Take this quiz to help you decide if you’re ready for a fixer upper.

Have you bought a fixer-upper? What was the process like? Share in the comments!

_______________________________________________________________________________________________

Photo Credits: “house updates” by mazaletel © 2011 (CC BY 2.0) | “Dining Room with Recycled Wood Ceiling” by Jeremy Levine © 2009 (CC BY 2.0)

Powered by OutboundEngine

6 Tips for Choosing the Best Offer for Your Home

By: G. M. Filisko

Have a plan for reviewing purchase offers so you don’t let the best slip through your fingers.

You’ve worked hard to get your home ready for sale and to price it properly. With any luck, offers will come quickly. You’ll need to review each carefully to determine its strengths and drawbacks and pick one to accept. Here’s a plan for evaluating offers.

1. Understand the process.

All offers are negotiable, as your agent will tell you. When you receive an offer, you can accept it, reject it, or respond by asking that terms be modified, which is called making a counteroffer.

2. Set baselines.

Decide in advance what terms are most important to you. For instance, if price is most important, you may need to be flexible on your closing date. Or if you want certainty that the transaction won’t fall apart because the buyer can’t get a mortgage, require a prequalified or cash buyer.

3. Create an offer review process.

If you think your home will receive multiple offers, work with your agent to establish a time frame during which buyers must submit offers. That gives your agent time to market your home to as many potential buyers as possible, and you time to review all the offers you receive.

4. Don’t take offers personally.

Selling your home can be emotional. But it’s simply a business transaction, and you should treat it that way. If your agent tells you a buyer complained that your kitchen is horribly outdated, justifying a lowball offer, don’t be offended. Consider it a sign the buyer is interested and understand that those comments are a negotiating tactic. Negotiate in kind.

5. Review every term.

Carefully evaluate all the terms of each offer. Price is important, but so are other terms. Is the buyer asking for property or fixtures – such as appliances, furniture, or window treatments – to be included in the sale that you plan to take with you?

Is the amount of earnest money the buyer proposes to deposit toward the down payment sufficient? The lower the earnest money, the less painful it will be for the buyer to forfeit those funds by walking away from the purchase if problems arise.

Have the buyers attached a prequalification or pre-approval letter, which means they’ve already been approved for financing? Or does the offer include a financing or other contingency? If so, the buyers can walk away from the deal if they can’t get a mortgage, and they’ll take their earnest money back, too. Are you comfortable with that uncertainty?

Is the buyer asking you to make concessions, like covering some closing costs? Are you willing, and can you afford to do that? Does the buyer’s proposed closing date mesh with your timeline?

With each factor, ask yourself: Is this a deal breaker, or can I compromise to achieve my ultimate goal of closing the sale?

6. Be creative.

If you’ve received an unacceptable offer through your agent, ask questions to determine what’s most important to the buyer and see if you can meet that need. You may learn the buyer has to move quickly. That may allow you to stand firm on price but offer to close quickly. The key to successfully negotiating the sale is to remain flexible.


G.M. Filisko is an attorney and award-winning writer who has survived several closings. A frequent contributor to many national publications including Bankrate.com, REALTOR® Magazine, and the American Bar Association Journal, she specializes in real estate, business, personal finance, and legal topics.

Source: HouseLogic (Published: February 10, 2010) Visit HouseLogic.com for more articles like this. Reprinted from HouseLogic.com with permission of the NATIONAL ASSOCIATION OF REALTORS®.

Custom Outdoor Kitchen

Essential Summer Grilling Tips

Summer’s almost here, and it’s time to start grilling! Whether you’re an old pro or new to the game, our essential guide will prepare you for the grilling season to come.

Choosing a Grill or Smoker
There are a variety of grilling options available, and each has its pros and cons.

  • Charcoal grills take longer to heat up, but they also achieve hotter temperatures, making them perfect for searing meat. And purists love charcoal for the flavor it produces.
  • Gas grills are a favorite among recreational grillers, largely because they’re easy to use and heat up quickly. They do cost more than charcoal grills up front, but they’re less expensive to operate over the long term.
  • Electric grills are portable and compact, providing a practical, affordable alternative for people living in apartments that restrict outdoor grilling. But critics of electric grills argue that they won’t give you that smoky barbecue flavor.
  • Smokers slow cook meat to achieve the distinct flavor connoisseurs love, but the process does take more time.

Gathering Gadgets for Grilling
Before you start cooking, make sure you have these grilling essentials:

  • Tongs
  • Skewers
  • Basting brush
  • Rubs and marinades
  • Heat-resistant grilling gloves
  • Wire basket for vegetables and seafood
  • Grill brush for cleaning

Finding the Best Recipes
Not sure what to cook? Check out The New York Times’ Summer Barbecue Essentials for an ample list of grilling recipes organized by category, including sauces, marinades and rubs.

What’s your favorite summer meal to cook on the grill? Share in the comments!

_______________________________________________________________________________________________

Photo Credit: “Custom Outdoor Kitchen by Paradise Restored Landscaping” by Media Director © 2011 (CC BY-ND 2.0)

Powered by OutboundEngine

Selecting the Right Window Treatment

Is it time to replace your window coverings? If they’re worn, damaged or dated, it’s probably time to start “window” shopping for something new. The good news is that now more than ever there are endless styles and colors to choose from. Find the right window treatment by considering your various options.

Determine Your Style — Take a look at your decor and decide if a traditional or more modern style of window coverings would suit your home. Nowadays window coverings come in a wide variety of finishes, colors and styles.

Choose Your Material — Determine what type of material fits your budget and maintenance preferences. Options include fabric, vinyl, aluminum, wood and even faux wood. You could frame your windows with curtain panels, opt for pleated or Roman shades, hang asymmetric swags, or mount horizontal or vertical wooden shutters.

Assess Your Functional Preferences — Think about your light control and privacy concerns. For example, you may require blackout blinds for a media room or bedrooms but not for the less private areas of your home where sunlight is welcome.

Choose Custom or Off-the-Shelf — Decide if you want to go with custom window coverings that are manufactured to fit the interior dimensions of your windows, or if an off-the-shelf window treatment will suit your needs.

Consider Energy Efficiency — Think about your heating and cooling needs. Cellular shades help regulate heat loss or gain in addition to controlling the light. If you’re likely to forget shade adjustment as a means of temperature regulation, consider upgrading to motorized shades.


_______________________________________________________________________________________________

Photo Credit: “Roman Shades in Breakfast Area.” © 2011 by PoshSurfside.com (CC BY-SA 2.0)

Powered by OutboundEngine

Here’s Why You Should Totally Snoop When House Hunting

This house-hunting checklist gives you carte blanche (well, almost) when viewing potential homes.

By: Jamie Wiebe

Ah, house hunting. It may technically be shopping, but it can feel more like breaking and entering. Even though you know the seller wants you there, does anyone really want you traipsing through their bedroom? Or looking through their closet? Or digging around in their basement? Awwwwkward.

But here’s something that should feel weirder: buying a home without knowing absolutely everything you can about it. The only way to avoid the second awkwardness is to face the first head on. When you’re house hunting, don’t think of poking around in someone else’s home as nosiness. It’s a smart, must-do investigation.

Here are six things you should absolutely do when viewing a home — no matter how awkward it feels.

1.  Soak in the Bathroom
Home buyers tend to peer into the bathroom for as long as they’d want a stranger to examine theirs: not long at all. But this isn’t the time to be quick. Josh Myler, a REALTOR® with The Agency in Los Angeles, encourages buyers to take a long, close perusal of the water closet.
Flush the toilet to find any backups in the system, and turn on the faucets to check the water pressure. Besides being annoying during showers, low pressure can indicate problems with the plumbing. “Water pressure can really cause headaches down the line if you don’t dig in before you make an offer,” says Myler. But always, always check with your agent first. In some markets, or with some sellers, it’s considered impolite to actually use the toilet. Or, if the owners already have moved, the water may be turned off. And that could be, ummm, awkward.

2.  Dig Around in the Closets
OK, don’t actually go through the owner’s stuff, but take a close look to assess how much storage space there is, and decide if it’ll meet your needs. “People don’t like to open closets because they think it’s rude, but if you’re buying the house, it’s one of the biggest investments,” says Myler. “You want to make sure there’s enough room for everything you need.” Before you step foot in a single house, take inventory of your current storage space, and know how much you’d like your next home to have.

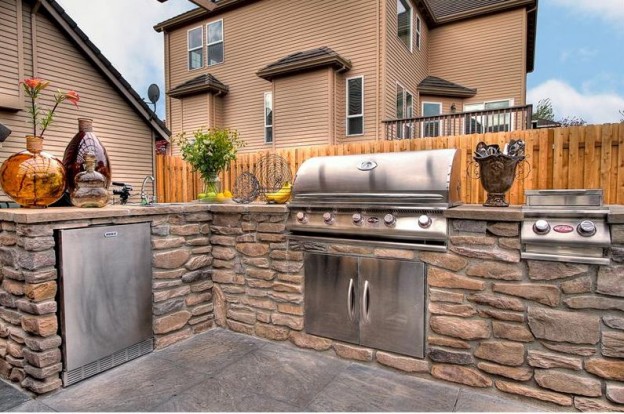
3.  Poke Around the Attic and Basement
Don’t just stick your head inside and call it good. Give the basement and attic a thorough investigation. If there are belongings piled against the wall, request they be moved before a second viewing. “I get very nervous when I see a packed basement and stuff against the wall,” says Kyle Alfriend, lead agent of The Alfriend Group in Dublin, Ohio.
That’s because hidden walls and ceilings can conceal water damage, including peeling or discolored paint, rotting wooden accents, or a white, chalky substance on the wall, which indicates water intrusion. As for the attic, a quick glance should tell you what you need to know. Are there rat droppings? Molding wood? Or is it generally clean, even if dusty? BYO flashlight for an enlightened examination.

4.  Meet the Neighbors
Sorry, introverts. There’s no better way to get a read on the neighborhood than by directly asking the actual neighbors. Pop by their home and strike up a chat. It’s a twofer: Not only might you get valuable information about the area — from the noisy bar on the street behind you to eager babysitters on the block — but paying attention to their attitude speaks volumes about your potential relationship with your maybe-neighbors. Do they seem excited to meet you? Or are they standoffish? “It’s not what they answer, but how they answer that will be very illuminating,” says Myler.

5.  Be an Amateur Investigator
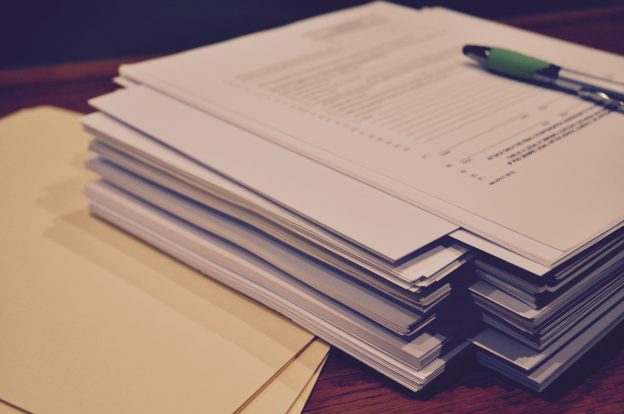
Anything seem fishy? Take your suspicions to city hall. If there are additions, pull the permits or get help from your buyer’s agent. You certainly don’t want to be responsible for tearing out that beautiful porch because the previous owners didn’t comply with the law. Also, check the certificate of occupancy and any easements — especially if you’re hoping to make any major changes. Both are public record. An easement simply gives someone the right to use property they don’t own. Often that other someone is your local government that needs it for public services, such as water. Myler remembers a friend who purchased a home with the goal of building a pool, only to find out an easement for the sewer line cut directly through the middle of the yard. Another common use is a shared driveway, such as when one homeowner has to pass through another homeowner’s property to reach their home.

6.  Ask Questions
If your sleuthing finds something concerning, don’t panic.
“Many times, there’s stuff that, at first glance, is real scary,” says Alfriend. “Often people will write off a house without digging into it, but there’s usually a perfectly logical, understandable reason, and it’s not a problem.”
Say you find a gaping hole in the drywall. It might be a huge red flag — or they might have rambunctious kids they absolutely plan to clean up after. “Boys can wrestle and put a foot through the thing, and it’s 30 minutes before a showing,” Alfriend says. There’s not much the sellers can do at that point.

With any problem, your first step is simple: Ask.

“Visit HouseLogic.com for more articles like this. Reprinted from HouseLogic.com with permission of the NATIONAL ASSOCIATION OF REALTORS®.”

How to Save on Home Remodel

We all know that remodeling a home can be very expensive, especially kitchen and bathroom remodels. But it doesn’t have to be! The key is to spend your money wisely – not to rush, choose the right materials and shopping around for the best deals.

First things first, make sure you know what look you are going after, have a plan in place and photos of colors and materials you prefer. Also, don’t forget to use coupons and promo codes. Typically, it is easier to negotiate deals with independents than big chain stores; the best way to score some good deals is to talk to the store manager or even owner and ask for 10% to 15% off. Also, don’t stop at the first shop you see, do some research and compare prices.

It is better to shop at one place not only for materials, but for appliances and fixtures, that way you can get package deals and sometimes get free delivery etc. Also, if you plan ahead and choose colors and finishes ahead, you can buy items in bulk and negotiate discounts up to 20% off!

Another way to save is to look into buying discounted items, many stores have display items, returns,  items missing original packaging or items with slight defects that are not even visible at times; for some it might not be what they are looking for, but it might save a lot of money.

There are so many ways to save and get great deals, just make sure to plan ahead and to not be afraid to ask for discounts and to negotiate!


Flickr Creative Commons: Courtney Walker (CC BY 2.0)
All photos used under this license.

Compile a Home Inventory with the Right Tools

By: Gwen Moran

Creating a home inventory for insurance doesn’t need to be complicated. All you really need is a pencil and paper. The key is to have a record of your possessions in the event you experience a theft or casualty loss from flood, fire, or other disaster.

But the more thorough the documentation of your belongings, the less likely you are to run into problems when you file an insurance claim. That’s why you should consider using a digital camera, fireproof safes, and other equipment to create and store your home inventory. Devote a full day to the task.

Take pictures of your belongings

Photos of your belongings go a long way toward demonstrating ownership and value. Digital photos are preferred, since they’re easier to print and store. A decent digital camera costs less than $100. Be sure to get full-room shots, as well as close-ups of items. Don’t neglect to photograph possessions inside drawers, cabinets, and closets.

Video is even more convenient and effective, especially since you can record audio along with the images. Describe items and any identifying details as you film your home room by room. Digital camcorders are available for less than $150. It’s a good idea to keep backup copies of digital files and hard-copy printouts in a safe place. (More on storage options below.)

Prepare a written home inventory

Images alone aren’t enough. You should also prepare a written home inventory. Your insurance company will likely ask for one if you ever file a claim. Include as much identifying detail as possible, such as serial numbers, brand names, purchase dates, and estimated costs. Keep a copy off-site, perhaps with a friend or in a bank safe-deposit box, in case your home is damaged or destroyed. Download our free home inventory worksheet to get started.

Home inventory software is also available. Enter information on your possessions, attach digital images, and store the data electronically. The Insurance Information Institute has a free program called Know Your Stuff, or there are a number of programs available for purchase.

Be sure to attach receipts to your home inventory list. If you’re storing your records electronically, you’ll want to scan receipts at a copy and print shop or purchase a scanner. Pick one up for as little as $50 at an office supply store. Digital copies of receipts come in handy if originals are damaged or lost.

Safe ways to store your records

When backing up digital files, a USB drive—sometimes called a “thumb” drive, due to its small size—can be useful. Buy one for as little as $5. Simply copy the files onto the drive and keep it somewhere safe, preferably away from your home.

You can also stash a drive in a pre-packed emergency “go” bag, which should be accessible in case you need to evacuate quickly. An external hard drive can perform the same function, though it’s less portable.

You can use a bank safe-deposit box to store paper records, drives, and other valuables off-premises. Rent may range from about $25 per year for a small box to more than $100 for a larger box.

If you like to keep important documents closer at hand, consider a fireproof safe, which is usually waterproof as well. You can find small safes for as little as $50, but a more representative range for good residential fireproof safes is $150 to $300. Larger, high-end safes can cost more than $1,000.

When your home inventory files are electronic, it’s relatively easy to use online backup systems to keep digital copies outside of your home. That’s a big plus if your computer is stolen or destroyed. Some backup services like Mozy offer limited storage space for free, while others like Carbonite charge $5 or more per month. Choose a backup service whose features fit your needs.

Source: HouseLogic “Visit HouseLogic.com for more articles like this. Reprinted from HouseLogic.com with permission of the NATIONAL ASSOCIATION OF REALTORS®.”
Flickr Creative Commons: andrewarchy (CC BY 2.0)
All photos used under this license.

5 Plants You (Almost) Never Have to Water

By:

Every plant needs water. But drought-resistant varieties need only dainty sips once they’re established, making them perfect for low-rainfall areas and low-energy gardeners.

Susan Gottlieb, an expert on drought-tolerant gardens, says native plants have the best chance of surviving dry summers or whatever nature throws at them.

“Natives have evolved to thrive in your climate without a whole lot of extra work,” Gottlieb says.

Include these five stunners in your landscaping and retire your watering can.

1. California lilac (Ceanothus):
This beautiful shrub flowers in late winter/early spring, emits a lovely fragrance, and shows flowers that run from white to purple. The “Concha” variety is prized for its deep blue blossoms. California lilacs grow best on dry, sloping land or in front of any structure that protects them from wind. They also prefer well-drained soil, and they don’t do well in clay.

2. Deer grass (Muhlenbergia rigens): Found in many desert gardens, deer grass is a spiky and dependable ornamental. It loves full sun, but also will grow in a little shade. Water every three days until established. After the first year, water only every three weeks.

3. Salvia, heatwave series: These dependable perennials were developed in Australia to withstand extreme weather. As a bonus, they bloom spring through fall, to the delight of hummingbirds and butterflies. Colors include white, pink, and salmon.

4. Dusty miller (Senecio cineraria):
This low-growing perennial is known for its silver-gray foliage, looks good as a ground cover, and thrives in containers stuffed with annuals. It hates standing around with wet roots, so plant it in soil that drains well.

5. Tickweed (Coreopsis): These yellow perennials add a burst of sunshine to any garden or border. More than 100 species are long-blooming (so long as you deadhead) and low-maintenance. They range from long and leggy to small and mounded. Also, they are easy to divide, creating many more plants season after season. (Here are more tips on taking care of perennial flowers.)


Flickr Creative Commons: Caitlyn Willows (CC BY 2.0)
All photos used under this license.
“Visit HouseLogic.com for more articles like this. Reprinted from HouseLogic.com with permission of the NATIONAL ASSOCIATION OF REALTORS®.”

Quick ways to improve your home value

If you are planning on selling your home or even if you are not planning to sell, you can start improvements now for profits later, and there are some easy and inexpensive ways to do that. Even small improvements can really pay off.

Cleaning. Getting rid of clutter and grime is probably one of the most important things to do as it can drive buyers away. Try to declutter and sort through things you don’t need and, possibly, have a garage sale to get rid of unnecessary things. Even if you are not planning to sell, it’s a good idea to sell what you don’t need anymore and make some extra cash.

Painting. A fresh coat of paint can change the feel of the whole house. You can change a color to more neutral ones or just add a fresh coat of paint. Another easy fix would be to paint doors as well, it will freshen everything up. You can do some research on what colors are best to use. Most buyers prefer neutrals since it’s less personal and it is easier for them to imagine themselves in a home.

Making repairs. You can start by fixing anything that is broken such as leaky faucets, loose light fixture. Kitchen is one of the most important rooms that sell the home, so it makes sense that it is important to spend some time updating it. Adding a fresh coat of paint, changing cabinet hardware and curtains would be an easy fix that will freshen the space and will give a clean look. Another important room to update is a bathroom, so changing faucets and adding brighter light fixture can change the look tremendously. If you can spend a little more, you can add new vanity and tile the floors.

As with interior, it is important to make some exterior work such as minor repairs, cleaning the yard and power washing the siding. These tips are an easy way to maintain your home and have it ready if you need to sell!


Flickr Creative Commons: Scott Lewis (CC BY 2.0)
All photos used under this license.

9 Ways to Deep Clean the Cruddiest Things in Your Home Without Breaking Into a Sweat

By:

Ahhh! Sparkling floors, gleaming windows, and zero dust bunnies. A thorough spring cleaning can make your abode feel brand new. But that immaculate house comes with a price — sore biceps. Instead of skimping on your annual deep clean because you’re zonked, use these brilliant hacks for nine of the most pain-in-the-butt tasks. You’ll get the same pristine results with half the time and energy.

1. Break Out the Drill on Your Bathtub

Cleaning a grungy tub can be back-breaking work. But here’s a genius idea that’ll save you time and sweat: Use your drill. Simply attach a foam ball polishing attachment, and use it to do the scrubbing for you. Look in the automotive section for the attachment, which is made specially for tackling grime without scratching surfaces.

2. Soak Stove Burners in Ammonia

Your stove burners take the bulk of the greasy, gunky mess during cooking, so do them a favor and give them a good cleaning. Don’t worry: No scrubbing involved. To clear the crud, combine your stove burners and 1/4 cup ammonia in a plastic bag and let sit overnight. They should come clean with a light sponge the next day.

3. Run Floor Vents Through the Dishwasher

wash floor vents in dishwasher

Image: Liz Foreman for HouseLogic

Scour as you might, removing all the accumulated dirt and dust from your floor and ceiling vents can be a spring cleaner’s nightmare. If yours are made of aluminum or steel, there’s a shortcut to spic-and-span: Just run them through the dishwasher on a water-only cycle.

4. Iron Out Bad Carpet Stains

Don’t spend an hour scrubbing out that nasty, set-in carpet splotch. Iron it out instead. Spritz a solution of one part vinegar, three parts water on the stain, and lay a clean cotton cloth on top. Turn your iron to its highest steam setting and run it over the stain for about 10 seconds to transfer the stain to the cloth and off your carpet.

5. Tie a Bag of Vinegar Around Your Showerhead

bag of vinegar cleans your showerhead

Image: Liz Foreman for HouseLogic

Mineral build-up on your showerhead can cause low water pressure and wonky water streams. But it’s easy to clean them without removing them. Using a rubber band, attach a bag of vinegar to your showerhead, making sure all the holes are submerged in the vinegar, and soak it overnight. Voilà. Good as new.

6. Make Your Leaf Blower Multi-Task

Forget the broom and rags when you’re cleaning out the garage. Whip out your leaf blower and let it blow all the dust, debris, and dead bugs (yuck!) away from the floor and shelving. Just be sure to put away light-weight things could accidentally get blown out with the trash.

7. Get Rid of Crayon Marks with Goo Gone

Removing evidence of your toddler’s overactive imagination from your gorgeous white walls can be a struggle, but a little bit of Goo Gone (traditionally used to clean sticker residue) will remove the crayon and your headache. Spray it on the drawing, wait a moment, and wipe it off cleanly — without exhausting your arms.

8. Boil Your Range Filter

boil your range filter to clean it

Image: One Good Think by Jillee

There’s no need to scrub the grease and grime off your range filters. Use a bit of baking soda and your largest pot instead. Set the water to boil, slowly add 1/2 cup of baking soda, and submerge your filters for about five minutes. (Make sure to dump the water somewhere safe. Grease in the drain is even worse than grimy filters.)

9. Sprinkle Your Mattress With Baking Soda

Your mattress needs a springtime refresh, too, but you sure can’t toss it in the washing machine. Cleaning gurus recommend dragging your mattress outside, beating it, and letting the sunshine help freshen it, then dragging it back in. But who has the muscle for that? This is much easier: Use a kitchen strainer to sprinkle baking soda over its surface and let sit for an hour or longer. Longer is better. Then use your vacuum’s upholstery attachment to suck up the odor-absorbing soda.

Source: http://bit.ly/1X4dczQ

“Visit HouseLogic.com for more articles like this. Reprinted from HouseLogic.com with permission of the NATIONAL ASSOCIATION OF REALTORS®.”