Tag Archives: Cleaning

Simple Homemade Cleaning Solutions

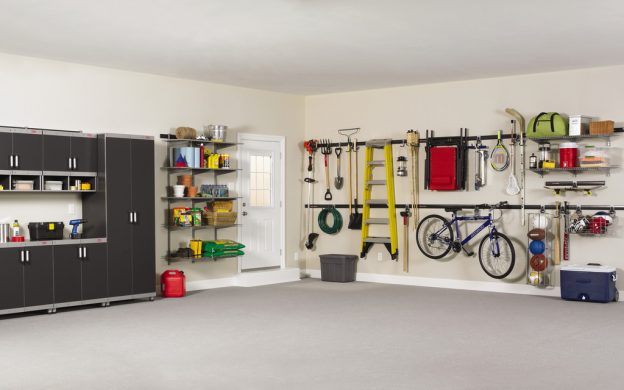
Whether you’re looking for greener ways to clean your home or you just want to save money at the store, there are simple household cleaning products you can make on your own. Use the recipes, tips and precautions below to help you get started.

All-Purpose Cleaner
Create your own inexpensive and effective all-purpose cleaner with liquid castile soap, tea tree oil, vodka, washing soda (not baking soda) and white vinegar. Boil the vinegar in the microwave, mix in the remaining ingredients according to the recipe and put the solution in a spray bottle for easy cleaning.

Laundry Detergent
Avoid questionable foaming agents and heavy fragrance by making your own laundry detergent. Measure the correct amounts of soap flakes or grated bar soap, borax and washing soda, and store in an airtight container.

Tips to Keep in Mind

  • Avoid mix-ups by labelling and dating each cleaning product when it’s made.
  • Add a few drops of essential oils like tea tree, lavender and lemon to scent your homemade cleaning solutions.
  • Substitute vodka for vinegar if you want a lighter smell.
  • Before using a homemade cleaner on delicate surfaces like hardwood floors or marble, first test it in a small, hidden area.

What to Avoid

  • Do not mix bleach with ammonia or vinegar. The dangerous combination can damage your respiratory system.
  • Keep hydrogen peroxide and vinegar separate at all times. Together they create peracetic acid, a highly corrosive compound that can lead to chemical burns.
  • Don’t use vinegar on reactive metal surfaces like aluminum or cast iron.
  • Refrain from using large amounts of any cleaning solution, homemade or store-bought, in unventilated areas.

When mixed and used properly, homemade cleaning solutions can work as well as, if not better than, commercial cleaners, plus they’re also easier on your wallet. Make sure you know the basics before you make your own cleaning products.


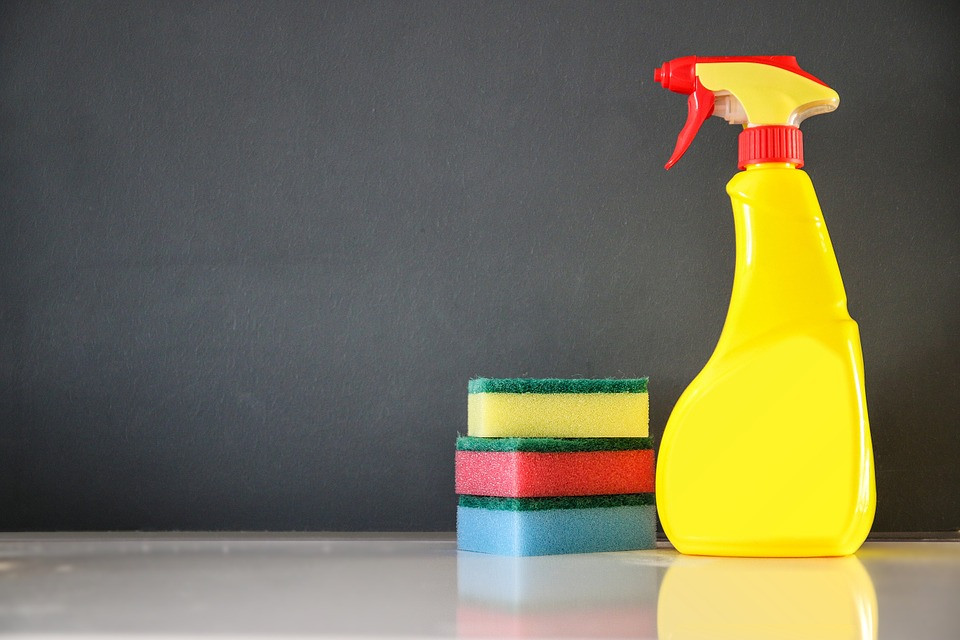
Photo Credit: “cleaning-268134_960_720” by Aerin Aichi © 2016 (Public Domain)

Powered by OutboundEngine

Garage Organization Ideas for Under $50

By: Jan Soults Walker

If clutter trumps cars in your garage, get organized (and make room for your vehicles) with these smart garage storage solutions, each costing less than $50.

Bikes, Skates, and Other Wheels

Bicycles, skateboards, scooters, and rollerblades – wheeled belongings can get underfoot and land you on your assets or bang up the car. Protect your paint job (not to mention your backside) with these wily storage solutions for your garage.

  • Hoist bicycles to the rafters with a rope-and-pulley system (starting around $40) that makes it easy to raise the bike and lock safely in place. When you’re ready to ride, release the lock and lower your bike to the garage floor. You’ll need an hour or two and basic tools to secure the pair of pulleys to ceiling joists and thread the ropes. (Similar hoists are available for kayaks or small boats; starting around $25.)
  • Avoid unintentional skateboard “tricks” with a specially designed wall rack that makes it easy for kids to hang up helmets and skateboards together; starting around $20. Secure this one to wall joists in less than an hour.
  • Keep scooters and bikes out of the way with tool hooks installed on a length of 1-by-6-inch lumber. You’ll pay $3 for each pair of vinyl-coated screw-in tool hooks and $1 per foot for lumber. You’ll need only an hour or two to secure the lumber to wall joists and screw the hooks into place along the board.

Sporting Goods

Active pursuits require a lot of gear that ends up in the garage. These organizers help tidy up all those sports balls, rackets, bats, gloves, clubs, fishing rods, and other outdoor fun-related goodies.

  • Bring together balls and bats on a convenient wire rack equipped with hangers that hold gloves too; starting around $35.
  • To keep your garage organization from going downhill, stash two pairs of snow skis, poles, and boots in one handy steel ski rack; $45. Securing this rack to wall studs helps it hold the weight of the equipment. If you can’t position it on studs, use wall anchors for a secure installation. You can do the task with or without anchors in an hour or two.
  • Make a port for your fishing rods by suspending two wire shelves from your garage ceiling about 5 feet apart, then threading the rods through the openings. Use shelves left over from a project or purchase a 4-foot-by-16-inch vinyl-coated wire shelf for less than $9, and saw it in half crosswise (or clip with bolt cutters) to make two 2-foot shelves. Snip additional wires where you need wider slots to accept pole handles or reels.

Tools

With a little imagination, you won’t need specially designed storage to organize your tools.

  • Conveniently hang wrenches and bungee cords using an ordinary vinyl-coated wire tie-and-belt rack, available at big box stores; $8.
  • Metal tools cling to a magnetized rail, keeping items in view and easy to retrieve; starting around $30. Simply screw the rail to wall studs to safely hold the weight of the tools (it’s an idea you may be drawn to.)
  • Cushion and protect tools by padding your toolbox drawers with a soft, non-slip liner. The open-weave design keeps moisture away and prevents tools from rolling around. Enough material to line eight average-size drawers is $15. Just cut the liner to length to fit and slip it into the drawer.
  • Organize small items – such as pencils, box cutters, and tape measures – by stashing them in electrical junction boxes; about $2 each (free if you have spares). Purchase a variety of sizes and shapes and secure them to studs or pegboard.

Yard and Garden Gear

Rakes, ladders, clippers, shovels, and sprays – a host of supplies keep your yard and garden looking lush and well-cared-for, but your garage? Not so much. Keep your garden and landscaping tools organized with these novel storage solutions.

  • Transform an old cabinet into a nifty garage storage unit on wheels. Hunt down an old four-drawer filing cabinet for a few dollars at a garage sale. Remove the drawers, turn it on its backside, and use a couple afternoons to apply paint and pegboard sides. Less than $25.
  • Hold heavy tools, long-handled implements, ladders, and more. Long steel rails with extruded holes mount high on the garage wall and secure to studs. Arrange a series of hooks and pegs on the rail to hang big tools. Two 48-inch rails sell for $22.
  • Secure a wooden pallet to wall studs to create a pocket for holding long-handled garden tools. To find free wooden pallets, check with local businesses as well as online classifieds, such as Craigslist. Cost: Free.
  • Keep bottles of fertilizers, repellants, and lubricants upright and easy to retrieve. A can rack ($15) prevents cans and bottles from tumbling off shelves.

Visit HouseLogic.com for more articles like this. Reprinted from HouseLogic.com with permission of the NATIONAL ASSOCIATION OF REALTORS®.

Featured Image Source: “Rubbermaid FastTrack Garage Organization System” by Rubbermaid Products © 2011 (CC BY 2.0)

Gym vs. Home chores: Which one burns more calories?

Do you ever feel guilty for staying home and cleaning your house instead of going for a jog, hitting the gym, or missing your yoga class? Well, fear not dear reader we have good news! You might burn more calories staying home and doing chores than lifting weights! Don’t believe us? No worries, take a look at this infographic and tell us if you were surprised as much as we were.

unnamed


Source: Yourgreenpal.com

5 Hacks to Make Your Studio Apartment Look Bigger

Do you live in a loft? studio apartment? Do you see yourself living there for a while, or do you just like that style and can’t see yourself leaving it? Well, we totally understand, and we’ve got tips for you to make every square footage of that room count. Here are five hacks to make your studio apartment look bigger than it actually is:


1. Lighten up the floors

Yep, that’s right. Make your floors a lighter color. Paint them, or if you’re renting the place  and your lease won’t allow it, then a wide bright rug will do the trick just fine, as well.


2.  Clear it up

By this we mean, clear, see-through furniture is your best choice. Side tables with see-through legs. All these help into making it seem there is less space, or clutter. Try it out and tell us what you think!

3. Two-for-One

To some people this idea never seems like fun, but then again some people love the efficiency of it. Think of buying one furniture that doubles into something else. For example, your side table could also double as a bar. These not only save you space, but also keeps you and almost forces you to keep the space less cluttered  and more organized.


4. The walls are your friends

Well, it might sound silly but they are! They become extra space you can occupy. For example, hang your necklaces, towels, etc. Have that become another space that you can use. Here’s a tip: make sure everything has at least 5-8 inches of space between each other. The trick is to never make it seem like it’s cluttered.


5. Higher Up

Ok, so now we’ve used up your walls, floor, and even doubled-up some furniture use. Now, look up. Yes, the ceilings. No, we’re not hanging anything from there today (although we recommend you do—some interior decorators suggest hanging plants gives it a sense of more space to a room), but we will be painting it. If you are lucky enough to have a high ceiling, then feel free to paint it! We suggest you do the same color as your floor to lighten up the place even more.


Well reader, here is where we end our post. Hopefully, you’ve find it informative! Feel free to tell us if you’ve tried any of this and it’s worked! Or, if you’d like to add some more tips, feel free to do so in the comments below!


Find the original article here.

The 6 ways Minnesotans can adjust their home for climate change


Winter is already here, but with the holiday hectic activities we might’ve forgotten how to prepare our houses for this abrupt climate change. Here’s how:


1. Sign up to power your home with renewables with Xcel Energy.

That means that for the next months although your bill might seem a little higher than usual, it won’t be as high as it could go. This is because Xcel won’t charge the usual $4 fuel charge that you usually see on your bills.


2. Clean your gutters.

With the heavy rain fall that will come after the snowy winter ends. The extreme rainfall could exceed the capacity of your gutter, and cause exterior damage to your home. Avoid this by cleaning them. Furthermore, be also sure to check your sprouts and be aware that the water should be flowing far away from the foundation but not fast enough for it not be absorbed into the soil.


3. Don’t place your valuables on your basement floor.

Purchase waterproof containers. Even if you think water doesn’t get to your basement, it’s better to be prepared. Store your valuables in a high place, where you know they won’t fall.


4. Consider adoption.

This might sound silly but think about adopting a tree! Or, planting one. This is just to add some environmentally conscious advice, in general. Since you know, trees are always highly needed.


5. Consider condensing technology.

“”These systems are very energy efficient and have the added benefit of being small enough to mount on a basement wall rather than sitting on the floor and thus reducing the likelihood that the heating plant will be ruined and a house made uninhabitable if water gets into a basement,” Hamilton wrote.”


6. Check the street sewer’s drains.

Clean sewers without debris or trash prevents localized flooding when the heavy rain fall occurs.


Find original article here by MPR News. 

House Cleaning Facts: Men vs. Women

As homeowners, couples often get into arguments about who does the most cleaning? Often times people want to divide it 50/50 but it’s not always the case. Here are some numbers that finally tell us the truth. Take a look.

house-cleaning-facts_50290cdcd0213_w1500So dear reader, after looking at these numbers, would you say you agree? Do you do most of the cleaning or the least? Let us know!


Summer Cleaning Tips for Getting Your Home Ready to Sell

SCT2You’re not the only one who needs to get in your best shape for summer – so does your house! Along with the season’s lovely, bright days of sunlight and warmth, comes the prime opportunity to sell your home. But similar to how you exercise, eat more veggies, and slather on some instant bronzer before slipping into your bikinis or board shorts, your house also needs preparation (staging, cleaning, etc.) to be shown in its best light to clients. These simple actions yield major results for the sales potential of a property. The following tips will help have your home swept off the market in no time.

1. De-Cluttering

First, get rid of any unnecessary items around your home, such as paperwork, children’s toys, or any other personal items that could distract buyers from the space itself.  Like the old adage says, “you only get one chance to make a first impression,” and you don’t want that impression to be an eyesore for critical, would-be buyers. Plus, clutter often makes a home feel less spacious, which is almost never a good thing. Begin by focusing on low-traffic areas such as the basement, attic and garage where you have your things in deep storage. Give them away to a charity, a local thrift store, throw them away or put them in self-storage. You can also organize a yard sale; summer’s the perfect time to have one! Whatever you choose, just avoid leaving extra belongings lying around the house, where they will only be in the way.

SCT1

2. General Cleaning

When it comes to cleaning, your primary focus should be the areas that buyers will frequent, such as the kitchen, living room, bathroom(s) and dining room. Check the areas that immediately catch the eye – countertops/tables, sofas, sinks, bathtubs/showers, etc. – and clean them as thoroughly as you can. Be diligent when you’re cleaning your bathroom and kitchen, since these are generally the rooms that most highly influence a buyer’s decision (because of their high renovation costs, buyers prefer them to already be in move-in condition). Yet these areas are also usually the hardest to clean and tend to collect the most germs. For example, your kitchen sink may have unsightly grease and food bits. The best way to get rid of them would be to use abrasive cleaners as they provide the extra power needed to clean tough spots. Use gel and liquid cleaners on sensitive surfaces and spray cleaners for most other areas. Avoid using powdery cleaners since they often leave a residue behind that requires even more cleaning.

3. Eliminating Mold

Something else that needs your attention is mildew and mold. Use bleach or other specific fungicides to vanquish unpleasant mold as soon as possible, as it is a huge turn-off to potential buyers. Depending on where you live, the differences between summer daylight and nighttime coolness can create condensation, which in time will allow mold to thrive. To lessen the chance of mildew problems, make sure bathrooms and any room where there is moisture are properly ventilated and have good air circulation.

4. Shining Glass

Start by vacuuming rooms before you wash your windows and glass so dust doesn’t end up sticking to them. Next, make sure you use a high-quality product specifically made for cleaning glass so it won’t leave streaks on your windows, mirrors, glass tabletops, etc. Also, be sure to use a good squeegee, which will further help prevent streaking. The shinier and more streak-free your glass is, the brighter a room will feel – perfect for capitalizing on all that summer sunshine!

SCT3

Hopefully, by following these guidelines your home will be in tip-top shape to be sold in no time!

A guest post by: House Clearance Bayswater

About the Author: Cora Carter is a professional writer. She lives in England with her husband and children. She wants to share her experience with her audience. She has many published articles on various topics such as home and garden, real estate, cleaning etc.