Category Archives: DIY

Tips for Planning a Bathroom Update

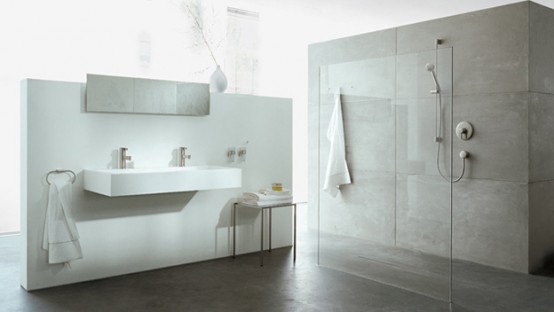
Do you want to improve the aesthetics of your bathroom? Before you disrupt your household with the hassle of a remodel, make sure you’re prepared. Familiarize yourself with this cost and ROI overview to help guide the planning process.

What Does This Type of Remodel Cost?
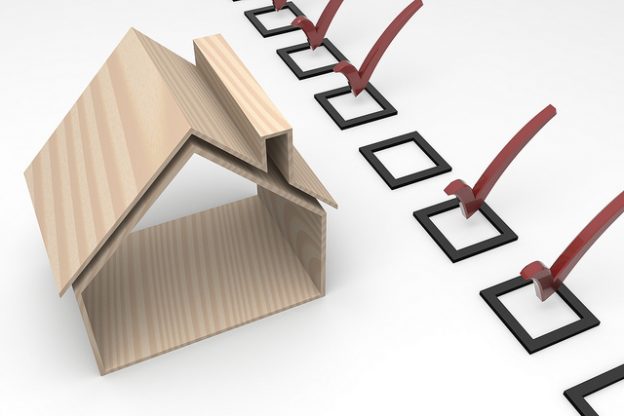
The first step to organizing a bathroom remodeling project is setting a budget. Understanding the potential costs involved can help you decide whether you’re working on a complete overhaul or focusing your resources on a few select changes.

Homeowners who make bathroom updates usually hope to recover at least a portion of their investment. An upscale bathroom remodel is among the projects that see the largest percentages of value increase year over year. But a high-end revamp can cost tens of thousands. If you’re working with a more modest budget, going with simple changes like updates to light fixtures, sinks, toilets and the like can refresh your space for significantly less.

What Should You Change?
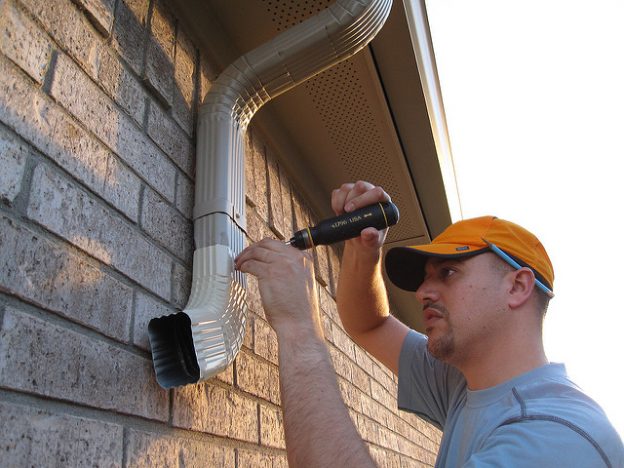
When planning bathroom renovations, it’s always smart to fix what’s broken first, especially since replacement projects see larger returns (74 percent) than remodeling ones (63.7 percent).

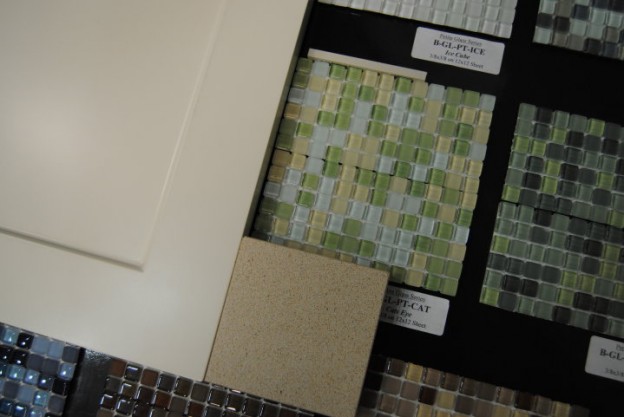
Once you’ve tackled any necessary replacements, make investment-savvy design selections that add value for you and your family. Trade out the garden tub for an expansive shower, add granite countertops or upgrade the vanity, ventilation or lighting. Finding what most benefits your family can lead to greater satisfaction years after the project’s completion.

With budgeting sense and some design know-how, you’ll have the confidence you need to initiate a successful bathroom remodel.


Powered by OutboundEngine

Featured Image Credit: “Gray Marble Bathroom” by Paintzen © 2016 (CC BY 2.0)

Urban Homesteading: 3 Ways to Produce Your Own Food

From backyard and rooftop gardens to community plots in parks and vacant lots, urban agriculture has become a nationwide movement, and more homeowners have taken an interest in producing their own food. For many urban homesteaders, it stems from a desire to know where their food comes from and live more sustainably.

Are you interested in participating? These three small-scale projects are great places to start.

Raising Backyard Chickens
Chickens provide a relatively inexpensive, low-maintenance way to feed your family, plus they act as complimentary fertilizer and chemical-free pest control. Before you buy baby chicks, make sure you research and follow local laws, city ordinances and homeowner association rules. Get inspired by the luxe chicken coop design above and then check out these DIY tips to build the perfect home for your feathered friends.

Taking Up Beekeeping
In the 1940s, America had five million beehives, and today, roughly half of those remain. A growing awareness of this drastic decline has led to an increase in urban beekeeping, to the tune of approximately 120,000 backyard beekeepers.

Becoming a beekeeper starts with a lot of research, followed by choosing the right equipment and bees. Don’t want to care for an entire colony? Plant native flower and weed varieties that help encourage bee pollination and reproduction.

Gardening and Canning
Whether it’s a large plot or a small section, a personal garden gives you control. Plus, you can preserve fresh fruits and vegetables via the canning process. While many homesteaders use yields from their garden, others buy extra produce in its peak season. Canning veggies and fruits is a family-friendly activity that lets you enjoy seasonal produce all year long.

Though urban homesteading may seem intimidating at first, it’s easier to start small. The projects above can help minimize your impact on the environment and allow you to take part in your own food production.


Powered by OutboundEngine

Featured Image Credit: “Chicken coop” by SoniaT 360. © 2015 (CC BY 2.0, via Flickr)

Latest Bathroom Trends and Features

According to a recent Houzz & Home survey, homeowners are investing more on bathroom renovations than in previous years, largely due to outdated designs and finishes. What types of upgrades are they spending money on? Here are some of the latest trends and tech updates being used in bathroom design.

Aesthetic Additions
You don’t have to tackle a full overhaul to make a big impact in the bathroom. Smaller changes can often bring big rewards, both from a resale perspective and by adding value to your daily experience.

Cosmetic favorites, according to the National Kitchen & Bath Association’s 2016 bathroom trends, include polished chrome finishes and neutral colors like white and gray. And bathrooms are becoming more streamlined with floating vanities, open shelving and undermount sinks. When larger changes are made, homeowners are incorporating amenities such as no-threshold showers and higher vanity heights that allow for aging in place.

Tech Touches
When you consider updating the appliances in your home, you may automatically think of doing so in the kitchen, living area or laundry room. Many, however, are quickly adopting technological advances in pursuit of the smart bathroom. Some of the more popular add-ons available include:

  • High-tech toilets: The most basic bathroom appliance now has seat-warming options, LED lights, motion sensors and automatic dryers.
  • Accessorized soaking tubs: You can take a basic bath, or you can soak in a chromotherapy tub with mood-enhanced lighting. Or enjoy an air bath, with massaging bubbles similar to a hot spring.
  • Digital faucets and showers: Along with reduced flow, which conserves water and money, faucet features also include touchless technology and programmable settings like a timed shower option.

Which market trends and tech updates appeal most to your family? When done well, these upgrades can improve your quality of life and increase the value of your home.


Powered by OutboundEngine

Featured Image Photo Credit: “luxury-bathroom-design-axor-8-554×312” by home space © 2010 (CC BY-SA 2.0)

Adding Privacy to Your Patio or Yard

A yard or patio is the perfect spot for enjoying the outdoors, whether that means playtime with your kids or quiet relaxation after a long day. And while you may like your neighbors, you may not want to see and hear them every time you venture into your backyard. If more privacy interests you, consider these options below:

Fencing — Probably the most straightforward solution, fences have long been the go-to for homeowners seeking seclusion. Be sure to check city ordinances and HOA policies before installing one.

Hedges — Shrubs like boxwood and privet are commonly planted along property lines. Choose an evergreen variety for year-long privacy. Make sure it’s suited for your climate and matures to your desired height.

Screens — Stylish and effective, folding wood-panel screens add a nice visual element while blocking unwanted views. Opt for a weather-resistant screen designed for the outdoors.

Trellis — The lattice configurations on these simple wooden structures offer an element of privacy. They’re also a perfect host for climbing vines and plants if you’d like additional coverage. Just be sure to check the sunlight and care requirements for the vegetation you plant.

Pergola — A pergola helps block views from second-story windows and balconies. It can be as simple or intricate as you’d like and will offer a degree of shade along with privacy.

Drapes — Budget-friendly and chic, panels help screen off your patio and can be moved as desired. Make sure the fabric is suitable for outdoor use or spray it with a water-resistant coating.

Vertical Garden — If you’re looking to increase privacy and also want to grow your own herbs, consider a living wall. You can buy prefabricated tower planters for easy installation.

If neighborly noise is a problem, a water fountain is a relaxing, sound-muffling solution. Consider your outdoor space and choose the privacy-adding options that work for you.


Powered by OutboundEngine

Featured Image Photo Credit: “RHS Chelsea Flower Show 2014” by Karen Roe © 2014 (CC BY 2.0)

Create an Annual Home Maintenance Checklist

Your vehicle requires routine maintenance to run smoothly, and the same goes for your house. Without service reminders, however, it can be easy to forget to tend to all the systems that keep your house fully functioning. Fortunately, you can create a simple annual maintenance checklist to properly care for your home and prevent potential issues from becoming major problems.

Start by making a list of each task you’ll need to complete over the coming year. Make sure your yearly home inspection includes all major systems (HVAC, electrical and plumbing), the interior and exterior of your home, water and septic tanks, doors and windows, and the attic or basement if applicable.

When that’s done, organize the list according to how often each item needs to be checked or maintained and set reminders accordingly. Your home maintenance checklist might start to look similar to this:

Monthly

  • Test smoke and carbon monoxide detectors.
  • Change air filters in the heating and air conditioning system.
  • Clean range hood filters to avoid possible grease fires.
  • Trim back any shrubbery or plant growth around the outdoor HVAC unit by at least 18 inches.

Quarterly

  • Check and wipe down sliding doors and window tracks.
  • Replace batteries in smoke detectors.
  • Test garage door and grease tracks as needed.

Semiannually

  • Clear gutters of spring and fall foliage.
  • Power wash windows and siding.
  • Schedule seasonal service of the HVAC system before summer and winter.

Annually

  • Inspect and insulate pipes to protect them from freezing.
  • Trim trees and shrubs away from the home’s exterior.
  • Touch up exterior paint and check for wood rot or water damage.
  • Check grouting in kitchen and bathroom and repair if necessary.

A home maintenance checklist will make it easier for you to manage the upkeep of your house. It can also help you catch minor issues before they become costly home repairs.


Powered by OutboundEngine

Featured Image Photo Credit: “3D Home Inspection Checklist” by Chris Potter via Flickr © 2012 (CC BY 2.0)

Replacing Rain Gutters and Downspouts

By: Pat Curry

Replace missing gutters and downspouts to prevent serious siding and foundation damage that may cost you $10,000 or more to repair.


Your home may be your castle, but if you’re missing downspouts and sections of gutter, you’ll certainly have a moat where daisies once flourished. Excess water near your foundation risks thousands of dollars in foundation repairs. The good news is that gutter or downspout replacement only requires about $15 worth of materials and three to four hours of your time.

Cost of Replacement Gutters and Downspouts

You’ll find aluminum and vinyl gutter components surprisingly affordable. Here’s what to look for:

  • Home centers sell 10-foot sections of gutter for less than $8.
  • A 10-foot downspout costs you less than $13.
  • Clip-up downspout extenders that snap out of the way when mowing cost about $8.
  • Gutter sealant runs about $7 for a 10-ounce tube.
  • Buy additional hangers and clips ($2) — the damage may have occurred because there weren’t enough of them in the first place.
  • In some cases, you’ll also need some end caps ($7 per set), joint connectors ($6), and a box of self-tapping screws ($6).

How to Replace Missing Gutters

More often than not, an entire 10-foot section of gutter will be damaged or missing. Use a hacksaw and tin snips to cut shorter lengths of replacement gutter.

  • Grab two ladders and enlist a helper.
  • Remove any old joint connectors and scrape any sealant or gunk off the existing gutter.
  • Do a test fit with new joint connectors.
  • Fill the ends of the new joint connectors with sealant before installing the gutter.
  • Loosen adjacent hangers if needed to add the replacement section.
  • Add hangers every 3 feet. Confirm that the gutter is pitched toward the downspout at a slope of 1/4-inch for every 10 feet.

How to Add a Downspout

Fit the new downspout up into the drop outlet (the piece at the end of gutter that feeds into the downspout). Notice that the drop outlet fits inside the downspout section to contain the flow and keep the jointing from leaking.

  • Fasten the joint with two self-tapping gutter screws. Add additional sections as needed.
  • Finish the downspout with an elbow positioned at least 6 inches above grade.
  • Attach the downspout extender (it should extend at least 5 feet into your yard).

Adding All-New Gutters and Downspouts

If there are lots of missing or damaged pieces, you may decide it is time for a whole new set of gutters. Most residential gutters are made of lightweight and durable aluminum. Vinyl, galvanized steel, and even copper also are options.

Aluminum gutters can range from about $4.50 to $9.50 per linear foot installed. On a 2,000-square-foot house with about 180 linear feet of gutters, that’s roughly $800 to $1,700.

Visit HouseLogic.com for more articles like this. Reprinted from HouseLogic.com with permission of the NATIONAL ASSOCIATION OF REALTORS®.

Featured Image Photo Credit: “gutter to rain barrel 013” by Roger Mommaerts © 2009 (CC BY-SA 2.0)

Simple Homemade Cleaning Solutions

Whether you’re looking for greener ways to clean your home or you just want to save money at the store, there are simple household cleaning products you can make on your own. Use the recipes, tips and precautions below to help you get started.

All-Purpose Cleaner
Create your own inexpensive and effective all-purpose cleaner with liquid castile soap, tea tree oil, vodka, washing soda (not baking soda) and white vinegar. Boil the vinegar in the microwave, mix in the remaining ingredients according to the recipe and put the solution in a spray bottle for easy cleaning.

Laundry Detergent
Avoid questionable foaming agents and heavy fragrance by making your own laundry detergent. Measure the correct amounts of soap flakes or grated bar soap, borax and washing soda, and store in an airtight container.

Tips to Keep in Mind

  • Avoid mix-ups by labelling and dating each cleaning product when it’s made.
  • Add a few drops of essential oils like tea tree, lavender and lemon to scent your homemade cleaning solutions.
  • Substitute vodka for vinegar if you want a lighter smell.
  • Before using a homemade cleaner on delicate surfaces like hardwood floors or marble, first test it in a small, hidden area.

What to Avoid

  • Do not mix bleach with ammonia or vinegar. The dangerous combination can damage your respiratory system.
  • Keep hydrogen peroxide and vinegar separate at all times. Together they create peracetic acid, a highly corrosive compound that can lead to chemical burns.
  • Don’t use vinegar on reactive metal surfaces like aluminum or cast iron.
  • Refrain from using large amounts of any cleaning solution, homemade or store-bought, in unventilated areas.

When mixed and used properly, homemade cleaning solutions can work as well as, if not better than, commercial cleaners, plus they’re also easier on your wallet. Make sure you know the basics before you make your own cleaning products.


Photo Credit: “cleaning-268134_960_720” by Aerin Aichi © 2016 (Public Domain)

Powered by OutboundEngine

Design Tips for Displaying a Prized Collection

Are you a collector? Whether you have a passion for art, photographs, action figures or something else entirely, here are some options for displaying your memorabilia.

Mount It on a Wall
Family photos and art pieces are commonplace, even among those who don’t consider themselves collectors. Fortunately, there’s no shortage of creative ways to display wall art.

The trick is to focus on the frames. For instance, one method is to use frames of the same color but of varying sizes and designs. This creates visual interest and unites the collection. Figurines and other small items with depth can be housed similarly using shadowboxes or a divided case.

Hang artwork at eye level for optimal visual appeal. For museum-quality results, keep the center point of your display or collection between 57 and 63 inches from the floor.

Record Collection

Photo Credit: “Awesome Record Collection” by Phil Dolby © 2015 (CC BY 2.0)

Showcase It on Shelves
Curio cabinets and other types of shelving work well for arranging collections and giving individual pieces a chance to stand out. Whether you’re into vintage dishes or figurines, consider grouping your collection according to color or pattern.

If you have glass or crystal items, sunny windows are ideal spots for your display. And avoid overloading shelves; open space can help make a visual impact.

Arrange It on Furniture
When it comes to displaying eclectic items or combining collections, look to the top of your favorite furniture pieces. On the surface of a credenza or console table, mix tall and short items as well as various shapes and textures along a horizontal line, similar to a cityscape.

How do you like to display your favorite collection items? Let us know in the comments!

___________________________________________________________________

Powered by OutboundEngine

Featured Image Photo Credit: “Vintage Fossil Watch Cases” by Tom Mascardo © 2009 (CC BY-ND 2.0)

How to Save on Home Remodel

We all know that remodeling a home can be very expensive, especially kitchen and bathroom remodels. But it doesn’t have to be! The key is to spend your money wisely – not to rush, choose the right materials and shopping around for the best deals.

First things first, make sure you know what look you are going after, have a plan in place and photos of colors and materials you prefer. Also, don’t forget to use coupons and promo codes. Typically, it is easier to negotiate deals with independents than big chain stores; the best way to score some good deals is to talk to the store manager or even owner and ask for 10% to 15% off. Also, don’t stop at the first shop you see, do some research and compare prices.

It is better to shop at one place not only for materials, but for appliances and fixtures, that way you can get package deals and sometimes get free delivery etc. Also, if you plan ahead and choose colors and finishes ahead, you can buy items in bulk and negotiate discounts up to 20% off!

Another way to save is to look into buying discounted items, many stores have display items, returns,  items missing original packaging or items with slight defects that are not even visible at times; for some it might not be what they are looking for, but it might save a lot of money.

There are so many ways to save and get great deals, just make sure to plan ahead and to not be afraid to ask for discounts and to negotiate!


Flickr Creative Commons: Courtney Walker (CC BY 2.0)
All photos used under this license.

Quick ways to improve your home value

If you are planning on selling your home or even if you are not planning to sell, you can start improvements now for profits later, and there are some easy and inexpensive ways to do that. Even small improvements can really pay off.

Cleaning. Getting rid of clutter and grime is probably one of the most important things to do as it can drive buyers away. Try to declutter and sort through things you don’t need and, possibly, have a garage sale to get rid of unnecessary things. Even if you are not planning to sell, it’s a good idea to sell what you don’t need anymore and make some extra cash.

Painting. A fresh coat of paint can change the feel of the whole house. You can change a color to more neutral ones or just add a fresh coat of paint. Another easy fix would be to paint doors as well, it will freshen everything up. You can do some research on what colors are best to use. Most buyers prefer neutrals since it’s less personal and it is easier for them to imagine themselves in a home.

Making repairs. You can start by fixing anything that is broken such as leaky faucets, loose light fixture. Kitchen is one of the most important rooms that sell the home, so it makes sense that it is important to spend some time updating it. Adding a fresh coat of paint, changing cabinet hardware and curtains would be an easy fix that will freshen the space and will give a clean look. Another important room to update is a bathroom, so changing faucets and adding brighter light fixture can change the look tremendously. If you can spend a little more, you can add new vanity and tile the floors.

As with interior, it is important to make some exterior work such as minor repairs, cleaning the yard and power washing the siding. These tips are an easy way to maintain your home and have it ready if you need to sell!


Flickr Creative Commons: Scott Lewis (CC BY 2.0)
All photos used under this license.