Category Archives: Reposts

Adding Privacy to Your Patio or Yard

A yard or patio is the perfect spot for enjoying the outdoors, whether that means playtime with your kids or quiet relaxation after a long day. And while you may like your neighbors, you may not want to see and hear them every time you venture into your backyard. If more privacy interests you, consider these options below:

Fencing — Probably the most straightforward solution, fences have long been the go-to for homeowners seeking seclusion. Be sure to check city ordinances and HOA policies before installing one.

Hedges — Shrubs like boxwood and privet are commonly planted along property lines. Choose an evergreen variety for year-long privacy. Make sure it’s suited for your climate and matures to your desired height.

Screens — Stylish and effective, folding wood-panel screens add a nice visual element while blocking unwanted views. Opt for a weather-resistant screen designed for the outdoors.

Trellis — The lattice configurations on these simple wooden structures offer an element of privacy. They’re also a perfect host for climbing vines and plants if you’d like additional coverage. Just be sure to check the sunlight and care requirements for the vegetation you plant.

Pergola — A pergola helps block views from second-story windows and balconies. It can be as simple or intricate as you’d like and will offer a degree of shade along with privacy.

Drapes — Budget-friendly and chic, panels help screen off your patio and can be moved as desired. Make sure the fabric is suitable for outdoor use or spray it with a water-resistant coating.

Vertical Garden — If you’re looking to increase privacy and also want to grow your own herbs, consider a living wall. You can buy prefabricated tower planters for easy installation.

If neighborly noise is a problem, a water fountain is a relaxing, sound-muffling solution. Consider your outdoor space and choose the privacy-adding options that work for you.


Powered by OutboundEngine

Featured Image Photo Credit: “RHS Chelsea Flower Show 2014” by Karen Roe © 2014 (CC BY 2.0)

Fall Landscaping Ideas: How to Prepare Your Yard for Winter

Fall landscaping preparation ideas ready your yard for a long winter and glorious spring.


By: Lisa Kaplan Gordon | Published: October 4, 2011

Fall landscaping chores are your last chance to prepare your property for winter, and to protect that curb appeal you’ve worked so hard to create. So pull on some gloves, grab your tools, and get ready to mulch, prune, and plant before snow and frozen ground turn the lights out on your landscaping.

Spread Mulch

“Fall mulching is better for the plants than spring mulching,” says Dan Taft, owner of The Cutting Edge in Chantilly, Va. “It helps protect roots from frost and helps retain moisture during a cold and dry winter.”

Spread 2 to 3 inches of fresh mulch around shrubs and trees. Taft warns home owners to avoid using free mulch from municipal piles, which often contain disease spores; instead, buy hardwood shredded mulch from home and garden centers, he says.

“Cheap, dump mulch mainly is made from trees that have died from disease,” Taft says. “Many diseases will linger in the mulch, like leaf spot and pine bark borers. You don’t want ground-up diseased plants around your landscaping.”

Remove the Dead and Dying

Fall isn’t the time to prune, because that encourages growth when healthy plants should remain dormant. But don’t shelve your shears and loppers yet. Fall is the time to neaten your landscaping before putting it to bed for the winter.

“If you remove dead landscaping in fall, you don’t have to look at it all winter,” Taft says.

  • Remove dead annuals.
  • Deadhead spent blooms, and cut back dead and desiccated ornamental grasses and perennials.
  • Lightly prune dead and dying branches from shrubs and trees. Carefully remove dried blossoms from hydrangea, but don’t remove dead-looking stalks, where new buds will form in spring.
  • After the first frost, cut back tea roses to about a third of their height.

Wrap Delicate Shrubs

Heavy snow, ice, and high winds can dry and split your delicate and pricey shrubs. To protect your landscaping from the winter elements:

  • Hide small plants under overturned plastic pots or buckets.
  • Wrap shrubs, such as boxwoods, in burlap.
  • Surround vulnerable trees with shredded leaves.

Take Advantage of Fall Sales

Early fall until the ground freezes is a good time to plant trees and shrubs. Not only do cooler weather and autumn rain put less stress on young landscaping plants, nurseries often have sales to empty their shelves before winter.

“They need to sell every plant by Dec. 1,” Taft says. “Nurseries generally pay a third of the price that you’re paying. So don’t be afraid to offer less than the asking price. If you’re buying several things, the manager may give you a break.”

Visit HouseLogic.com for more articles like this. Reprinted from HouseLogic.com with permission of the NATIONAL ASSOCIATION OF REALTORS®.

Featured Image Photo Credit: “Williamstown, Massachusetts” by Doug Kerr © 2010 (CC BY-SA 2.0; Edited)

How to Tame Your Jungly Late-Summer Garden

Don’t suffer the ugly anymore. Here’s how to give your garden a fall makeover.

By: Lisa Kaplan Gordon


Your poor, sad garden. The spent vines, stubborn weeds, and greens gone to seed are putting a pitiful spin on your backyard retreat.

But it doesn’t have to be that way. Here are some simple tips to tidy up your garden and yard, which will also help prep them for next year.

Bury the Dead

Nothing looks sadder than leggy tomato vines, yellow zucchini leaves, and dried-up perennials that long ago displayed their last bloom. So pull and prune the dead or dying plants in your garden.

Bury spent plants in your compost pile; double-bag diseased and infested plants and place in the trash. (Empty mulch bags are great final resting places for these plants, so be sure to stockpile them in spring.)

If your tomato vines are still bearing fruit, keep staking and pruning them until the first hard frost, when they’ll likely die. And give the birds a break and leave some seed-bearing but spent blooms for them. They love sunflowers, cone flowers, berries, and black-eyed Susans.

Pull Weeds

This is the last time this season to pull weeds. Pluck them before they flower and send seeds throughout your garden that will rest in winter and sprout in spring.

If you have a mulcher, chop the weeds and throw them on your compost pile. If you want to be extra sure that weed seeds are dead, bag weeds in black plastic and place in a sunny place for a couple of months. The heat will kill the seeds. Then throw the cooked weeds on your compost pile.

Harvest Seeds

One way to cut garden expenses is to harvest and store seeds. One large sunflower, for instance, can provide seeds for hundreds of plants next spring. Here are some seed guidelines.

  • Harvest seeds from heirloom vegetables and standard plants.
  • Disease can spread through seeds, so only harvest seeds from your healthiest plants.
  • Don’t harvest seeds from hybrid plants, which often are sterile or will look nothing like the parent plant.
  • Only harvest mature seeds from dry and faded blooms and pods. Mature seeds are often cream colored or brown.
  • After seeds are dry, store them in envelopes or glass jars in a cool, dry place.

Gather Supports

Stack and cover metal tomato cages. Bundle wooden or bamboo stakes, and store in a dry place so they don’t rot over winter. And retrieve panty-hose vine ties that you can re-use next spring.

Instead of throwing out broken cages and stakes, repurpose them. Snip off remaining cage legs to use for pepper supports. Broken tomato steaks will support smaller plants if you whittle one end into a point, so it easily slips into the ground.

Visit HouseLogic.com for more articles like this. Reprinted from HouseLogic.com with permission of the NATIONAL ASSOCIATION OF REALTORS®.

Featured Image Photo Credit: “September Backyard” by Brian Teutsch ©2014 (CC BY 2.0)

Replacing Rain Gutters and Downspouts

By: Pat Curry

Replace missing gutters and downspouts to prevent serious siding and foundation damage that may cost you $10,000 or more to repair.


Your home may be your castle, but if you’re missing downspouts and sections of gutter, you’ll certainly have a moat where daisies once flourished. Excess water near your foundation risks thousands of dollars in foundation repairs. The good news is that gutter or downspout replacement only requires about $15 worth of materials and three to four hours of your time.

Cost of Replacement Gutters and Downspouts

You’ll find aluminum and vinyl gutter components surprisingly affordable. Here’s what to look for:

  • Home centers sell 10-foot sections of gutter for less than $8.
  • A 10-foot downspout costs you less than $13.
  • Clip-up downspout extenders that snap out of the way when mowing cost about $8.
  • Gutter sealant runs about $7 for a 10-ounce tube.
  • Buy additional hangers and clips ($2) — the damage may have occurred because there weren’t enough of them in the first place.
  • In some cases, you’ll also need some end caps ($7 per set), joint connectors ($6), and a box of self-tapping screws ($6).

How to Replace Missing Gutters

More often than not, an entire 10-foot section of gutter will be damaged or missing. Use a hacksaw and tin snips to cut shorter lengths of replacement gutter.

  • Grab two ladders and enlist a helper.
  • Remove any old joint connectors and scrape any sealant or gunk off the existing gutter.
  • Do a test fit with new joint connectors.
  • Fill the ends of the new joint connectors with sealant before installing the gutter.
  • Loosen adjacent hangers if needed to add the replacement section.
  • Add hangers every 3 feet. Confirm that the gutter is pitched toward the downspout at a slope of 1/4-inch for every 10 feet.

How to Add a Downspout

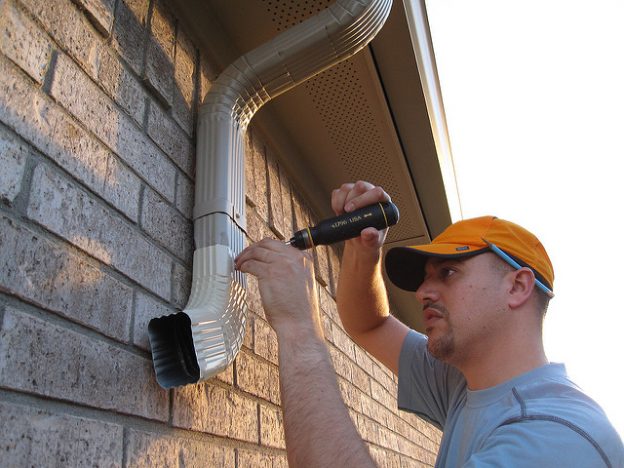
Fit the new downspout up into the drop outlet (the piece at the end of gutter that feeds into the downspout). Notice that the drop outlet fits inside the downspout section to contain the flow and keep the jointing from leaking.

  • Fasten the joint with two self-tapping gutter screws. Add additional sections as needed.
  • Finish the downspout with an elbow positioned at least 6 inches above grade.
  • Attach the downspout extender (it should extend at least 5 feet into your yard).

Adding All-New Gutters and Downspouts

If there are lots of missing or damaged pieces, you may decide it is time for a whole new set of gutters. Most residential gutters are made of lightweight and durable aluminum. Vinyl, galvanized steel, and even copper also are options.

Aluminum gutters can range from about $4.50 to $9.50 per linear foot installed. On a 2,000-square-foot house with about 180 linear feet of gutters, that’s roughly $800 to $1,700.

Visit HouseLogic.com for more articles like this. Reprinted from HouseLogic.com with permission of the NATIONAL ASSOCIATION OF REALTORS®.

Featured Image Photo Credit: “gutter to rain barrel 013” by Roger Mommaerts © 2009 (CC BY-SA 2.0)

Simple Homemade Cleaning Solutions

Whether you’re looking for greener ways to clean your home or you just want to save money at the store, there are simple household cleaning products you can make on your own. Use the recipes, tips and precautions below to help you get started.

All-Purpose Cleaner
Create your own inexpensive and effective all-purpose cleaner with liquid castile soap, tea tree oil, vodka, washing soda (not baking soda) and white vinegar. Boil the vinegar in the microwave, mix in the remaining ingredients according to the recipe and put the solution in a spray bottle for easy cleaning.

Laundry Detergent
Avoid questionable foaming agents and heavy fragrance by making your own laundry detergent. Measure the correct amounts of soap flakes or grated bar soap, borax and washing soda, and store in an airtight container.

Tips to Keep in Mind

  • Avoid mix-ups by labelling and dating each cleaning product when it’s made.
  • Add a few drops of essential oils like tea tree, lavender and lemon to scent your homemade cleaning solutions.
  • Substitute vodka for vinegar if you want a lighter smell.
  • Before using a homemade cleaner on delicate surfaces like hardwood floors or marble, first test it in a small, hidden area.

What to Avoid

  • Do not mix bleach with ammonia or vinegar. The dangerous combination can damage your respiratory system.
  • Keep hydrogen peroxide and vinegar separate at all times. Together they create peracetic acid, a highly corrosive compound that can lead to chemical burns.
  • Don’t use vinegar on reactive metal surfaces like aluminum or cast iron.
  • Refrain from using large amounts of any cleaning solution, homemade or store-bought, in unventilated areas.

When mixed and used properly, homemade cleaning solutions can work as well as, if not better than, commercial cleaners, plus they’re also easier on your wallet. Make sure you know the basics before you make your own cleaning products.


Photo Credit: “cleaning-268134_960_720” by Aerin Aichi © 2016 (Public Domain)

Powered by OutboundEngine

4 Tips to Determine How Much Mortgage You Can Afford

By: G. M. Filisko

Published: August 20, 2014

Homeownership should make you feel safe and secure, and that includes financially. Be sure you can afford your home by calculating how much of a mortgage you can safely fit into your budget.

Why not just take out the biggest mortgage a lender says you can have? Because your lender bases that number on a formula that doesn’t consider your current and future financial and personal goals.

Think ahead to major life events and consider how those might influence your budget. Do you want to return to school for an advanced degree? Will a new child add day care to your monthly expenses? Does a relative plan to eventually live with you and contribute to the mortgage?

Consider those lifestyle issues as you check out these four methods for estimating the amount of mortgage you can afford.

1.  Prepare a detailed budget.

The oldest rule of thumb says you can typically afford a home priced two to three times your gross income. So, if you earn $100,000, you can typically afford a home between $200,000 and $300,000.

But that’s not the best method because it doesn’t take into account your monthly expenses and debts. Those costs greatly influence how much you can afford. Let’s say you earn $100,000 a year but have $1,000 in monthly payments for student debt, car loans, and credit card minimum payments. You don’t have as much money to pay your mortgage as someone earning the same income with no debts.

Better option: Prepare a family budget that tallies your ongoing monthly bills for everything — credit cards, car and student loans, lunch at work, day care, date night, vacations, and savings.

See what’s left over to spend on homeownership costs, like your mortgage, property taxes, insurance, maintenance, utilities, and community association fees, if applicable.

2.  Factor in your downpayment.

How much money do you have for a downpayment? The higher your downpayment, the lower your monthly payments will be. If you put down at least 20% of the home’s cost, you may not have to get private mortgage insurance, which protects the lender if you default and costs hundreds each month. That leaves more money for your mortgage payment.

The lower your downpayment, the higher the loan amount you’ll need to qualify for and the higher your monthly mortgage payment.

But, if interest rates and/or home prices are rising and you wait to buy until you accumulate a bigger downpayment, you may end up paying more for your home.

3.  Consider your overall debt.

Lenders generally follow the 43% rule. Your monthly mortgage payments covering your home loan principal, interest, taxes and insurance, plus all your other bills, like car loans, utilities, and credit cards, shouldn’t exceed 43% of your gross annual income.

Here’s an example of how the 43% calculation works for a homebuyer making $100,000 a year before taxes:

1.    Your gross annual income is $100,000.

2.    Multiply $100,000 by 43% to get $43,000 in annual income.

3.    Divide $43,000 by 12 months to convert the annual 43% limit into a monthly upper limit of $3,583.

4.    All your monthly bills including your potential mortgage can’t go above $3,583 per month.

You might find a lender willing to give you a mortgage with a payment that goes above the 43% line, but consider carefully before you take it. Evidence from studies of mortgage loans suggest that borrowers who go over the limit are more likely to run into trouble making monthly payments, the Consumer Financial Protection Bureau warns.

4.  Use your rent as a mortgage guide.

The tax benefits of homeownership generally allow you to afford a mortgage payment — including taxes and insurance — of about one-third more than your current rent payment without changing your lifestyle. So you can multiply your current rent by 1.33 to arrive at a rough estimate of a mortgage payment.

Here’s an example: If you currently pay $1,500 per month in rent, you should be able to comfortably afford a $2,000 monthly mortgage payment after factoring in the tax benefits of homeownership.

However, if you’re struggling to keep up with your rent, buy a home that will give you the same payment rather than going up to a higher monthly payment. You’ll have additional costs for homeownership that your landlord now covers, like property taxes and repairs. If there’s no room in your budget for those extras, you could become financially stressed.

Also consider whether or not you’ll itemize your deductions. If you take the standard deduction, you can’t also deduct mortgage interest payments. Talking to a tax adviser, or using a tax software program to do a “what if” tax return, can help you see your tax situation more clearly.

G.M. Filisko is an attorney and award-winning writer who’s owned her own home for more than 20 years. A frequent contributor to many national publications including Bankrate.com, REALTOR® Magazine, and the American Bar Association Journal, she specializes in real estate, business, personal finance, and legal topics.


Visit HouseLogic.com for more articles like this. Reprinted from HouseLogic.com with permission of the NATIONAL ASSOCIATION OF REALTORS®.

Take Back Your Energy Bills — Energy-Efficiency Measures that Work for You

5 simple (really!) things you can do to put a dent in energy bills.

By: Christina Hoffmann | Published: July 3, 2013


You know that 10 or 20 pounds that you just can’t seem to lose? You do the right thing – eat kale or log time on the StairMaster – but the weight clings. You feel powerless.

It’s like that with our energy bills, too. Eighty-nine percent of us think we’re not using as much energy as we did five years ago, and almost one-half of us think our homes are energy efficient. But 59% also say our energy bills have gone up, according to consumer research by the Shelton Group, a marketing and advertising agency that specializes in energy-efficiency issues.

Call that the Snackwell’s effect, says Shelton Group CEO Suzanne Shelton. Basically, we’re saying, “I bought these CFLs so now I can leave the lights on and not pay more. I bought a high-efficiency washer and dryer because I want to do more laundry without paying more. I ate the salad, so I can have the chocolate cake.”

Unfortunately, that disconnect has led to defeat. We feel victimized by our energy bills and powerless to the point where we’re making fewer energy-efficient improvements. In fact, Shelton’s research shows consumers made only 2.6 improvements in 2012 compared with 4.6 in 2010.

Until the day we all get energy dashboards in our home, we’re here to help you understand why your energy costs are where they are and how you can take back your energy bills.

Hint: You need to do four or five energy-efficient things to see a difference; one or two won’t cut it. But – good news! – they don’t cost much to do.
Energy bills chart

Why Do We Feel Victimized?

We don’t know what we’re buying. Energy is the only product we buy on a daily basis for which we have no idea how much we pay until a month later, says Cliff Majersik, executive director of the Institute for Market Transformation, a research and policy-making nonprofit focused on improving buildings’ energy efficiency.

Energy costs are going up. Inflation is mainly to blame. Your bills are projected to rise on average 2% per year through 2040, according to the U.S. Energy Information Administration (EIA), the research arm of the energy department. Expect about 3.4% per year if the economy gets sluggish.

Other trends pushing up our energy usage:

  • A growing population means more homes.
  • New homes are getting bigger, though our families are getting smaller, according to the Census Bureau.
  • We’re plugging in more devices (computers, smart phones, tablets, X-boxes, plasma TVs) per household — and not unplugging them. (More on behavior later.)

In fact, for the first time, energy use for appliances, electronics, water heating, and lighting accounts for more than heating and cooling, according to EIA.

Still, overall consumption is pretty flat through 2040, thanks in part to:

  • Appliance efficiencies.
  • Population migration to dryer, warmer climates in the South and West.
  • People living in multifamily rather than single-family situations.

We make assumptions.

Assumption #1. Unless a home is old – more than 30 years – we figure it was built to code, which requires a certain amount of energy efficiency. But building codes change pretty regularly, so even newer homes benefit from improvements, says Lee Ann Head, vice president of research and insights with the Shelton Group.

Assumption #2. We think utilities are out to get us: They’ll jack up prices no matter what we do. Shelton’s research shows consumers blame utilities above oil companies and the government. But keep this in mind: To get rate changes, utilities must make a formal case to public utility commissions. They’re also on the hook to pay for such things as:

  • Infrastructure upgrades put off for years
  • Efficiencies
  • Equipment repairs after bouts of nutty weather
  • Consumer rebates

Another reason rates seem stuck is because utilities bundle fuel, service, and delivery fees together.

Assumption #3. Our expectations for energy savings are out of whack. When the Shelton Group asked consumers what they would expect to recoup if they invested $4,000 in energy-efficient home improvements, they said about 75% to 80%.

Sorry, unless you invest in some kind of renewable energy source like geothermal and solar, you won’t see that kind of savings. If you do all the right things (we’ll tell you about the best five later), you could expect a 20% to 30% reduction, Head says, particularly if you don’t succumb to the Snackwell’s effect.

What does 30% translate into? $660 in savings per year or $55 per month, based on the average household energy spend of $2,200 per year, according to the U.S. Department of Energy (DOE).

Assumption #4. Many of us don’t know how to make the biggest impact on our homes. That’s why we sometimes replace our windows first, when that should probably be fifth or sixth on the list of energy-efficient improvements, Shelton says.

There’s nothing wrong with investing in new windows. They feel sturdier; look pretty; increase the value of your home; feel safer than old, crooked windows; and, yes, offer energy savings you can feel (no more draft).

But if you spend $9,000 to $12,000 on windows and save 7% to 15% on your energy bill, according to DOE data, when you could have spent around $1,000 for new insulation, caulking, and sealing, and saved 10% to 20% on your energy bill, you made the wrong choice if your only reason for the project was reducing energy costs.

The real reasons for getting new windows are “emotional rather than financial,” Shelton says.

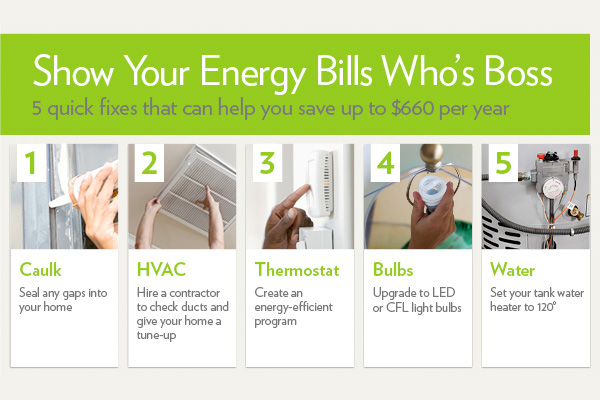
The 5 Things You Should Do to Show Your Bills Who’s Boss

1. Caulk and seal air leaks. Buy a few cans of Great Stuff and knock yourself out over a weekend, sealing penetrations into your home from:

  • Plumbing lines
  • Electricity wires
  • Recessed lighting
  • Windows
  • Crawlspaces
  • Attics

Savings: Up to $220 per year, says EPA

2. Hire an HVAC contractor to take a hard look at all your ductwork – are there any ducts leaking that need to be resealed? – and give you an HVAC tune-up.

Savings: Up to $330 per year, for duct sealing and tune up, says DOE

3. Program your thermostat. Shelton found that 40% of consumers in her survey admit to not programming their thermostat to energy-saving settings. She thinks it’s even higher.

Savings: Up to $180 per year, says EPA

4. Replace all your light bulbs with LEDs or CFLs. We suggest LEDs, which have fewer issues than CFLs (namely, no mercury), and, although expensive, are coming down in price. We’ve even seen a $10 model.

Savings: $75 per year by replacing your five most frequently-used bulbs with Energy Star-rated models, says EPA.

5. Reduce the temperature on your water heater. Set your tank heater to 120 degrees — not the 140 degrees most are set to out of the box. Dropping 20 degrees could save 6% to 10% on your annual water heating costs, which are 14% to 18% of your utility bills. Also wrap an older water heater and the hot water pipes in insulating material to save on heat loss.

Savings: $18 to $39 per year

Important note: Resist the urge to total these numbers for an annual savings. The estimated savings for each product or activity can’t be summed because of “interactive effects,” says DOE. If you first replace your central AC with a more efficient one, saving, say, 15% on energy consumption, and then seal ducts, you wouldn’t save as much total energy on duct sealing as you would have if you had first sealed them. There’s just less energy to save at that point.

But these practices can help you achieve the goal of shaving 20% to 30% of your annual bill ($440 to $660).

Energy Savings is Addictive. What Else Can We Do?

If you want to go further and spend more, especially if you’re not planning to sell your home soon:

  • Add insulation. Anything you can do to shore up your building envelope is good.
  • If major appliances like your HVAC and water heater are nearing the end of their useful life, research energy-efficient replacements and keep the info where you’ll remember. Otherwise, you’ll make a reactive purchase when the unit finally breaks.
  • Contact your utility about rebates for investing in improvements. Or visit DSIRE, a database of federal, state, local, and utility rebates searchable by state. Energy Star has a discount and rebate finder, too.

A Final Word: Oh, Behave!

Remember the Snackwell’s effect? If your behavior — unplugging chargeable devices from the socket when they’re done charging; putting computers, TVs, and media on smart strips and turning them off at once; reprogramming your thermostat at daylight savings time — doesn’t support your improvements, you’re letting energy, an invisible product, win.

Visit HouseLogic.com for more articles like this. Reprinted from HouseLogic.com with permission of the NATIONAL ASSOCIATION OF REALTORS®.

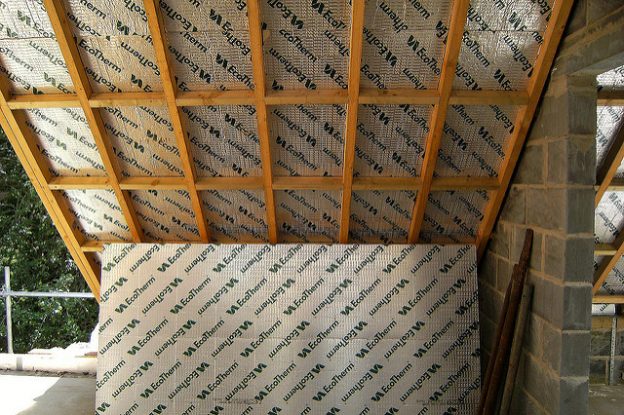
Featured Image Credit: “Roof Insulation Goes On ” by Martin Pettitt ©2008 (CC BY 2.0)

Landscaping Tips for Added Security

In 2014, just over 1.7 million individuals fell victim to burglary according to the FBI. Sometimes deadbolts and alarm systems just aren’t enough to deter thieves. But there are outdoor security measures you can take to prevent property loss at the hands of a burglar. Here are 10 ways you can help protect your home with a well-planned landscape design:

  1. Use plant deterrents. Thorny shrubs and bushes like holly or roses help thwart would-be burglars.
  2. Prune vegetation regularly. Unkempt hedges provide hiding spots where perpetrators can lurk.
  3. Trim the trees. Leave sufficient distance between tree branches and the roof or second-story windows to limit intruder access.
  4. Leave a clear line of sight to windows or doors. Blocking these views leaves your home more vulnerable to break-ins.
  5. Invest in accent lights. Illuminate your yard to eliminate potential hiding spots.
  6. Install additional lighting. Don’t just rely on the porch light. Consider adding motion-sensitive lighting to help ward off possible intruders.
  7. Put gravel beneath ground-floor windows. Burglars rely on silence; stepping on gravel can be a startling repellent.
  8. Protect the back door. Many thieves try this less obvious point of entry first.
  9. Replace solid privacy fences. Solid fencing helps intruders go undetected. Partial privacy fencing is a more secure option.
  10. Lock all gates. It seems obvious, but it’s still worth a mention. Keep front and back gates locked at all times.

While pleasing to look at, landscaping does more than enhance your home’s outdoor aesthetic. Consider whether your current setup promotes security or makes your home appealing to thieves. Use these landscaping security tips to help prevent your home from becoming the target of a burglary.


Powered by Outbound Engine

Photo Source: “Ashburn | Sherwood Real Estate” by Sherwood CC © 2010 (CC BY 2.0)

Garage Organization Ideas for Under $50

By: Jan Soults Walker

If clutter trumps cars in your garage, get organized (and make room for your vehicles) with these smart garage storage solutions, each costing less than $50.

Bikes, Skates, and Other Wheels

Bicycles, skateboards, scooters, and rollerblades – wheeled belongings can get underfoot and land you on your assets or bang up the car. Protect your paint job (not to mention your backside) with these wily storage solutions for your garage.

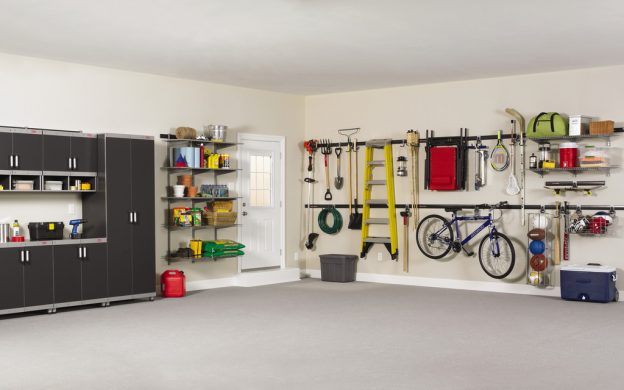
  • Hoist bicycles to the rafters with a rope-and-pulley system (starting around $40) that makes it easy to raise the bike and lock safely in place. When you’re ready to ride, release the lock and lower your bike to the garage floor. You’ll need an hour or two and basic tools to secure the pair of pulleys to ceiling joists and thread the ropes. (Similar hoists are available for kayaks or small boats; starting around $25.)
  • Avoid unintentional skateboard “tricks” with a specially designed wall rack that makes it easy for kids to hang up helmets and skateboards together; starting around $20. Secure this one to wall joists in less than an hour.
  • Keep scooters and bikes out of the way with tool hooks installed on a length of 1-by-6-inch lumber. You’ll pay $3 for each pair of vinyl-coated screw-in tool hooks and $1 per foot for lumber. You’ll need only an hour or two to secure the lumber to wall joists and screw the hooks into place along the board.

Sporting Goods

Active pursuits require a lot of gear that ends up in the garage. These organizers help tidy up all those sports balls, rackets, bats, gloves, clubs, fishing rods, and other outdoor fun-related goodies.

  • Bring together balls and bats on a convenient wire rack equipped with hangers that hold gloves too; starting around $35.
  • To keep your garage organization from going downhill, stash two pairs of snow skis, poles, and boots in one handy steel ski rack; $45. Securing this rack to wall studs helps it hold the weight of the equipment. If you can’t position it on studs, use wall anchors for a secure installation. You can do the task with or without anchors in an hour or two.
  • Make a port for your fishing rods by suspending two wire shelves from your garage ceiling about 5 feet apart, then threading the rods through the openings. Use shelves left over from a project or purchase a 4-foot-by-16-inch vinyl-coated wire shelf for less than $9, and saw it in half crosswise (or clip with bolt cutters) to make two 2-foot shelves. Snip additional wires where you need wider slots to accept pole handles or reels.

Tools

With a little imagination, you won’t need specially designed storage to organize your tools.

  • Conveniently hang wrenches and bungee cords using an ordinary vinyl-coated wire tie-and-belt rack, available at big box stores; $8.
  • Metal tools cling to a magnetized rail, keeping items in view and easy to retrieve; starting around $30. Simply screw the rail to wall studs to safely hold the weight of the tools (it’s an idea you may be drawn to.)
  • Cushion and protect tools by padding your toolbox drawers with a soft, non-slip liner. The open-weave design keeps moisture away and prevents tools from rolling around. Enough material to line eight average-size drawers is $15. Just cut the liner to length to fit and slip it into the drawer.
  • Organize small items – such as pencils, box cutters, and tape measures – by stashing them in electrical junction boxes; about $2 each (free if you have spares). Purchase a variety of sizes and shapes and secure them to studs or pegboard.

Yard and Garden Gear

Rakes, ladders, clippers, shovels, and sprays – a host of supplies keep your yard and garden looking lush and well-cared-for, but your garage? Not so much. Keep your garden and landscaping tools organized with these novel storage solutions.

  • Transform an old cabinet into a nifty garage storage unit on wheels. Hunt down an old four-drawer filing cabinet for a few dollars at a garage sale. Remove the drawers, turn it on its backside, and use a couple afternoons to apply paint and pegboard sides. Less than $25.
  • Hold heavy tools, long-handled implements, ladders, and more. Long steel rails with extruded holes mount high on the garage wall and secure to studs. Arrange a series of hooks and pegs on the rail to hang big tools. Two 48-inch rails sell for $22.
  • Secure a wooden pallet to wall studs to create a pocket for holding long-handled garden tools. To find free wooden pallets, check with local businesses as well as online classifieds, such as Craigslist. Cost: Free.
  • Keep bottles of fertilizers, repellants, and lubricants upright and easy to retrieve. A can rack ($15) prevents cans and bottles from tumbling off shelves.

Visit HouseLogic.com for more articles like this. Reprinted from HouseLogic.com with permission of the NATIONAL ASSOCIATION OF REALTORS®.

Featured Image Source: “Rubbermaid FastTrack Garage Organization System” by Rubbermaid Products © 2011 (CC BY 2.0)

How to Keep Your House Cool Without AC

By: Lisa Kaplan Gordon

Want summer comfort but hate the AC? Follow these tips on how to keep your house cool without frosty air conditioning.

You don’t have to switch on the air conditioner to get a big chill this summer. These tips will help you keep your house cool without AC, which will save energy (and avoid AC wars with your family).

Block that Sun!

When sunlight enters your house, it turns into heat. You’ll keep your house cooler if you reduce solar heat gain by keeping sunlight out.

  • Close the drapes: Line them with light-colored fabric that reflects the sun, and close them during the hottest part of the day. Let them pillow onto the floor to block air movement.
  • Add awnings: Install them on south- and west-facing windows to reduce solar heat gain by up to 77%, says the U.S. Department of Energy. Make your own by tacking up sheets outside your windows and draping the ends over a railing or lawn chair.
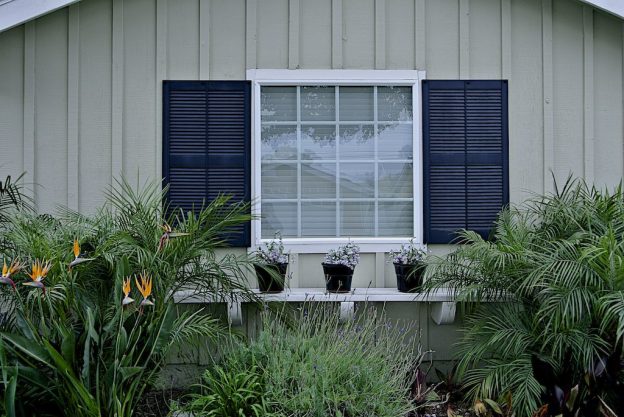
  • Install shutters: Interior and exterior shutters not only reduce heat gain and loss, but they also add security and protect against bad weather. Interior shutters with adjustable slats let you control how much sun you let in.
  • Apply high-reflectivity window film: Install energy-saving window films on east- and west-facing windows, which will keep you cool in summer, but let in warming sun in the winter. Mirror-like films are more effective than colored transparent films.

Open Those Windows

Be sure to open windows when the outside temperature is lower than the inside. Cool air helps lower the temps of everything – walls, floors, furniture – that will absorb heat as temps rise, helping inside air say cooler longer.

To create cross-ventilation, open windows on opposite sides of the house. Good ventilation helps reduce VOCs and prevents mold.

Fire Up Fans

  • Portable fans: At night, place fans in open windows to move cool air. In the day, put fans where you feel their cooling breezes (moving air evaporates perspiration and lowers your body temperature). To get extra cool, place glasses or bowls of ice water in front of fans, which will chill the moving air.
  • Ceiling fans: For maximum cooling effect, make sure ceiling fans spin in the direction that pushes air down, rather than sucks it up. Be sure to turn off fans when you’re not in the room, because fan motors give off heat, too.
  • Whole house fans: A whole-house fan ($1,000 to $1,600, including install) exhausts hot inside air out through roof vents. Make sure your windows are open when you run a whole-house fan.

Power Down Appliances

You’ll save money and reduce heat output by turning off appliances you’re not using, particularly your computer and television. Powering down multiple appliances is easier if you connect them to the same power strip.

Don’t use heat- and steam-generating appliances — ranges, ovens, washers, dryers — during the hottest part of the day. In fact, take advantage of the heat by drying clothes outside on a line.

Plant Trees and Vines

These green house-coolers shade your home’s exterior and keep sunlight out of windows. Plant them by west-facing walls, where the sun is strongest.

Deciduous trees, which leaf out in spring and drop leaves in fall, are best because they provide shade in summer, then let in sun when temperatures drop in autumn. Select trees that are native to your area, which have a better chance of surviving. When planting, determine the height, canopy width, and root spread of the mature tree and plant accordingly.

Climbing vines, such as ivy and Virginia creeper, also are good outside insulators. To prevent vine rootlets or tendrils from compromising your siding, grow them on trellises or wires about 6 inches away from the house.

Speaking of shade, here are smart, inexpensive ideas for shading your patio.

Want more tips for staying cool this summer? Substitute CFL and LED bulbs for hotter incandescent lights.

Also, try insulating your garage door to prevent heat buildup.

What are your favorite ways to stay chill in the summer? Shout ’em out in the comments section!

Source: HouseLogic Visit HouseLogic.com for more articles like this. Reprinted from HouseLogic.com with permission of the NATIONAL ASSOCIATION OF REALTORS®.

Photo Credit: “Blue Shutters” by Myles Jeffries © 2012 (CC BY 2.0)